How to Install Tropical Hardwood Decking
The complete installation guide for tropical hardwood decking — covering joist spacing, acclimation, fasteners, pre-drilling, and more.
Universal rules that apply to all tropical hardwood species, plus species-specific guides below.
Tropical Hardwood Deck Installation Overview
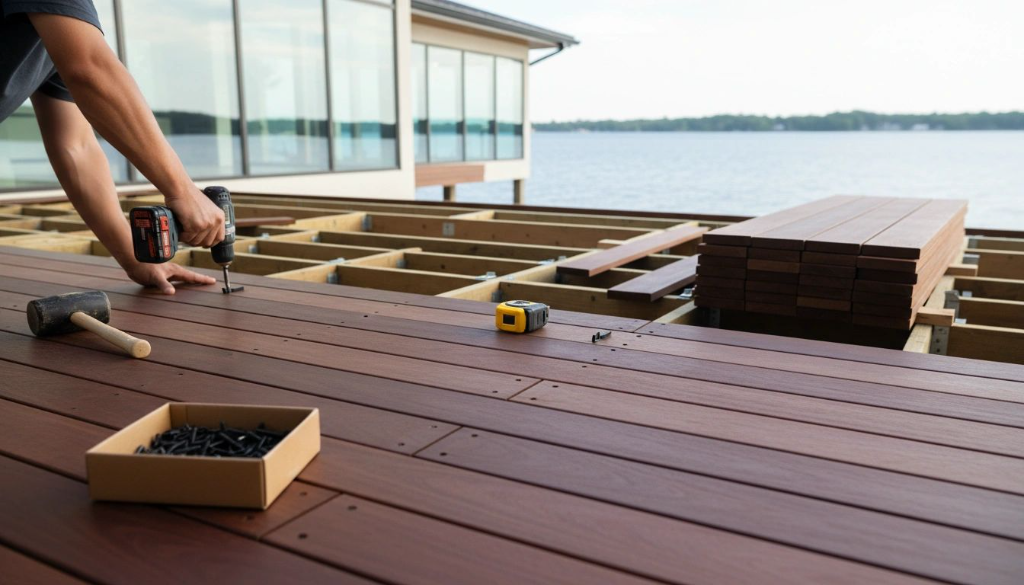
Installing tropical hardwood decking requires specialized knowledge that differs significantly from softwood or composite installation. These premium woods are extremely dense — meaning every screw hole must be pre-drilled and only stainless steel fasteners should be used.
This guide covers the universal rules that apply to all tropical hardwood species: joist spacing, gap requirements, acclimation timelines, fastener selection, and common mistakes to avoid. For species-specific details — including exact shrinkage rates, workability notes, and tailored installation tips — choose your species from the guides below.
Installation Guides by Species
Each species has unique requirements. Choose yours for species-specific joist spacing, board gaps, fastener rules, acclimation, tips, and a custom installation plan builder.
Ipe Installation Guide
Janka: 3,680 lbf
View guideCumaru Installation Guide
Janka: 3,330 lbf
View guideTigerwood Installation Guide
Janka: 2,160 lbf
View guideGarapa Installation Guide
Janka: 1,630 lbf
View guideMassaranduba Installation Guide
Janka: 3,190 lbf
View guideRed Balau Installation Guide
Janka: 2,700 lbf
View guideYou've Made a Great Choice!
Tropical hardwoods are beautiful, strong, dense and long-lasting. Because you will enjoy this wood for years to come, tropical hardwoods benefit from extra attention to detail for proper installation. Always consult local building codes (ICC) and the American Wood Council (AWC) for structural requirements. This guide simplifies the installation process of your beautiful hardwood.
Tropical hardwoods like Ipe are known as "ironwood" because they are so durable, but that means they also require a few special considerations during installation. Due to the density of these hardwoods, regular tools frequently are not enough to handle the job.
Required Tools
- • Sawing: Premium carbide-tipped saw blades
- • Drilling: Brad point or Fostner drill bits for cleaner holes
Before Installation
Get the Necessary Permits
Before you begin to install, check with your local municipal offices about any applicable local ordinances. They will inform you of building ordinances and codes. Obtaining the proper permits is solely your responsibility. We advise you to consult with an architect before starting because each project is unique.
Where to Use Tropical Hardwoods
Our tropical hardwoods are generally air-dried lumber unless otherwise specified and air-dried is perfect for outdoor projects such as:
- Playgrounds
- Decks
- Sheds
- Planter boxes
- Outdoor furniture
- Siding
Profile Options for Your Application
There are three basic profile styles available:
- 1. Pre-grooved decking: Allows for hidden fastener clips between boards
- 2. Standard (E4E): Traditional face-screw installation method
- 3. Tongue and groove boards: Should only be used under covered porches or patios. When tongue and groove are used without protection, too much water can accumulate causing buckling, swelling and cupping.
How to Acclimate Tropical Hardwood Before Installation
Tropical hardwood needs to acclimate to the local conditions (humidity and temperature). This means it needs to sit near where you will be installing it to adjust to its new climate. Leave it there for a minimum general estimate of 7 days or longer depending on your specific climate and storage conditions.
Don't store tropical hardwood for any more than 28 days without checking with us at Ipe Woods USA for additional handling tips.
Do's and Don'ts:
Store boards on blocks of wood minimum 12 inches from the ground for ventilation
Cover boards with plywood during acclimation
DO NOT cover with any tarp or plastic - these trap water and moisture
Air boards outside - never in enclosed spaces like garages
Separate rows of boards with wooden shims for proper ventilation
Never store decking for more than 28 days without consulting us
Proper Acclimation Setup Example
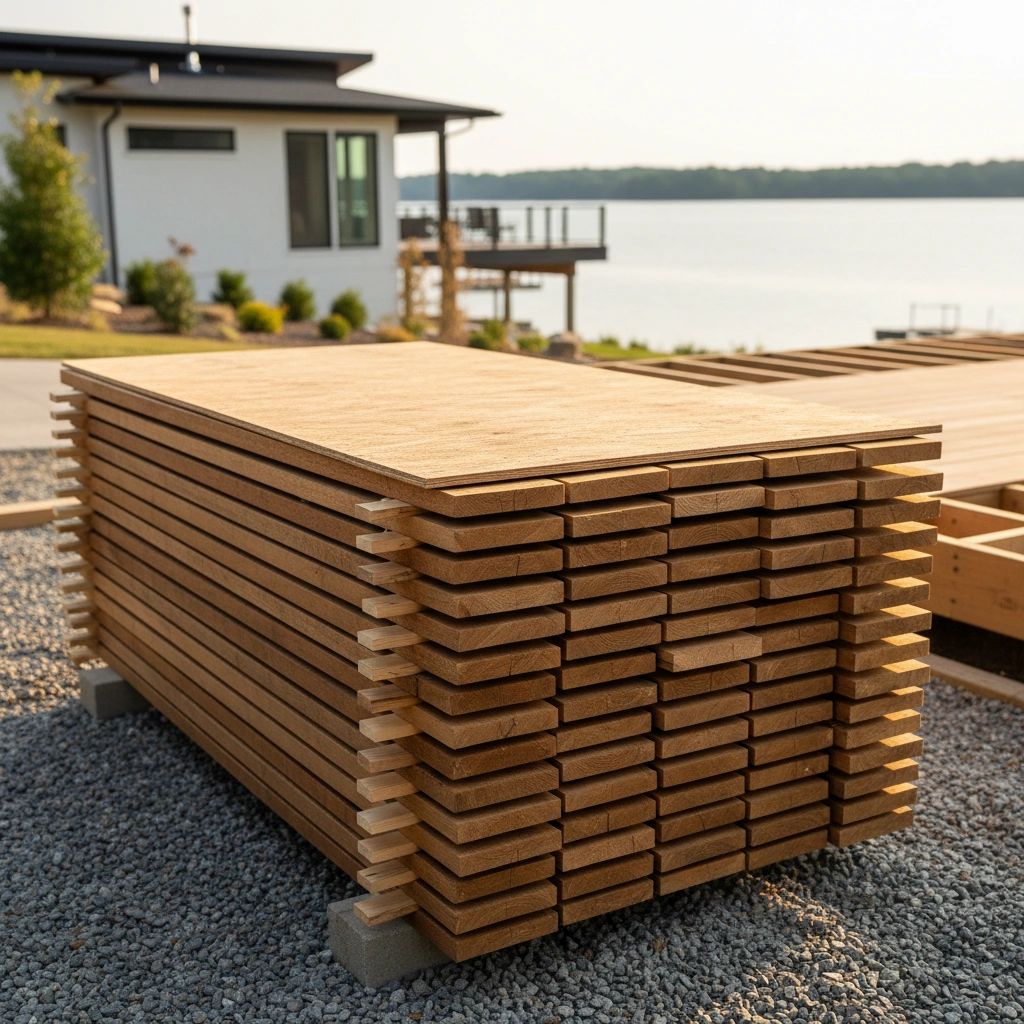
Example of properly stickered hardwood decking elevated on blocks for acclimation
Hardwood Deck Installation: Joist Spacing, Gap & Airflow Requirements
Joist Spacing
Pitch
Minimum pitch required:
- Standard decking: ¼" per 10 feet
- Tongue & Groove: ¼" per foot
Gap
Leave a space/gap of 3/32" between boards for ventilation and expansion/contraction.
Airflow
Allow 18" of unobstructed air under the joists. Open sides allow for cross ventilation.
Critical Warnings
- • Never install hardwood decking over concrete
- • Never allow water to pool under or on the deck
- • DO NOT build your hardwood deck over concrete slabs or blocks, ever!
Hardwood Decking Installation Steps & Best Practices
Sealing End Cuts
Ipe Woods USA deck lumber is shipped with ends sealed using special clear wax to prevent adverse movement and end checking. When you make fresh cuts, seal them within 24 hours using an end-grain sealer.
Important: End sealant is NOT for the decking surface. If any touches the face of a board, wipe it up immediately!
Measure Twice, Cut Once
The old adage applies perfectly to hardwood installation. These premium materials deserve careful planning and precise execution. Take your time with measurements and layout before making cuts.
Fastener Placement
- Pre-drill ALL holes using brad point or Forstner bits
- Use only stainless steel fasteners (grade 304 or 316)
- Countersink screws slightly below the surface
- Space fasteners 3/4" from board edges minimum
Installing Hidden Fastener Clips
Watch this step-by-step guide on how to properly install hidden fastener clips for a clean, screw-free deck surface.
Framing Considerations
Install framing material with the crown (bumpy side) up to help with water drainage. This is critical for preventing standing water which can cause cupping.
Only 1/8" of improper pitch can cause standing water to pool, which "drowns" the wood over time. Proper pitch means proper drainage, protecting both your deck and your home.
Common Hardwood Deck Installation Mistakes to Avoid
Learn from the most common installation mistakes to ensure your tropical hardwood deck lasts for decades. Watch this comprehensive guide on what NOT to do when installing your hardwood decking.
Top Mistakes Covered:
- • Installing over concrete slabs or blocks
- • Inadequate ventilation and airflow
- • Improper acclimation or storage
- • Not pre-drilling fastener holes
- • Using incorrect fasteners
- • Poor drainage and pitch issues
Hardwood Deck Installation FAQ
Related Guides
IMPORTANT LEGAL DISCLAIMER
Contact any building departments before you start designing your dream deck. They know the codes and ordinances about what you are able to build and where you can do it. Obtaining the proper permits is solely your responsibility.
Ipe Woods USA can provide information to help you in making your selections. It is solely your responsibility to know your building codes and Ipe Woods USA can and will not be liable if you neglect to obtain proper permits, this includes but is not limited to failing any compliance with any and all zoning codes and building ordinances.
The information contained on this site is meant to be used as a reference only and is not to be interpreted as a guarantee of any sort.
To properly install your deck, we recommend that you work with an experienced professional. All information on the site is only generalized recommendations. We are not and will not be held liable for improper installation, for any reason, including but is not limited to information inaccuracy. Again, consult a professional for all things related to installation.
Always use proper safety measures when working with wood.