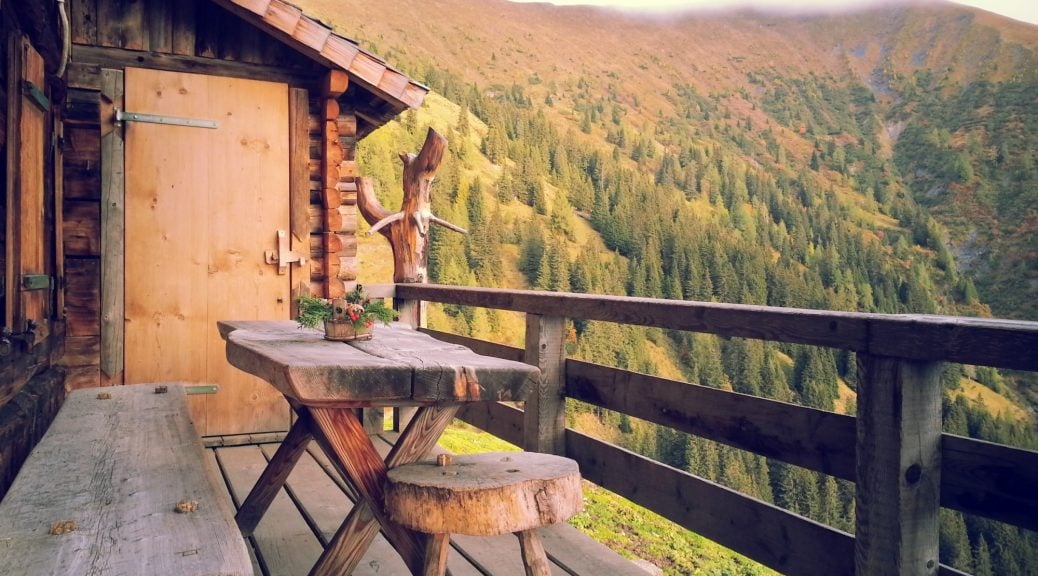
Category Archives: Tips

How Long Do Decks Last? The Complete Guide

Are you wondering, “How long do decks last?” Well, it’s a broad question that depends on a lot of different factors.

Lucky for you, we have a long list of answers that will explain everything. Here, in this guide, we compare various types of decking materials and how long they last on average. Plus, we include certain factors that may lengthen or limit the lifespan of your deck.

Whether you’re in the market for a new deck or you’re wondering about a deck you’ve already purchased, read through this guide for the answers you seek.

Solid Wood Decks

Most people in the market prefer the aesthetically pleasing look of a solid wood deck. What you may not realize is that most wood decking types (except for ipe) are the least durable of all decking materials. Thus, they also have the shortest expected lifespan.

Being a natural material, wood is biodegradable. In other words, it’s inherently designed to rot away once dead so that it won’t pile up in the forest like a landfill.

So, there’s a lot of care and maintenance required in order to make your wooden deck last a long time. First, it’s best if the wood is given special treatment to make it more resistant to weather, rot, bugs, and other causes of deterioration. With proper maintenance, most wood decks can last about 20 years.

However, the type of wood makes a big difference in lifespan, especially in the case of ipe. Here are a few examples of the longest-lasting wood decking types.

Cedar Decks

Cedar is the most popular choice for those who want a wood deck that will last a long time. Cedar is naturally resistant to many factors of deterioration. For example, cedarwood oil is a naturally-occurring pesticide.

But it will need to be kept very clean and you’ll have to seal it about every 2 years. Plus, it’s soft enough to be easily scratched by pets or patio furniture. Still, if you’re very careful and you rigorously follow the proper maintenance steps, you might get up to 40 years of use out of your cedar deck.

Ipe Decks

Ipe is one of the hardest woods available for decking. It is unlikely to ever get scratched by anything.

It’s also unlikely that you’ll ever find a longer-lasting deck. its extreme density and high concentration of natural preservatives allow it to last up to 75 years outdoors. Like any wood deck, it’s still important to seal ipe decking about every 2 years.

Pressure-Treated Wood Decks

Wood that’s artificially pressure-treated has a pretty good lifespan, about 20 years maximum. However, this type of wood is infamous for its tendency to warp and twist over time.

Factors That Affect the Lifespan of Your Wood Deck

Decks that stay under constant shade take a long time to dry any time they get wet. The constant moisture accelerates wear and can lead to mold growth and other problems.

This is also true of decks that sit directly on the soil. Soil also holds moisture for a long time.

On the other hand, an excess of sunlight on the deck tends to burn up the sealer much faster. If your deck gets lots of sun, you should seal it more often (once a year or more). But it’s best, for the lifespan of your deck, to prevent all of these situations, if possible.

Composite Decks

Unlike wood decks, composite decks require almost no maintenance. Sweep them and wash them with soap and water once in a while and that’s about it.

Being made of artificial substances, they’re not susceptible to natural decay. In fact, they’re intentionally engineered for that purpose.

That’s not to say that they’re indestructible or that they’ll never need replacing. It’s very possible to scuff or scratch your composite deck. Dragging heavy, metal furniture across the deck can do this.

Another common problem with composite decks is that their color can fade over time. Even worse, this problem can’t be fixed.

That is, paints and stains won’t adhere well to composite decking. If you try painting it, the paint will easily rub right off.

Ultimately, a composite deck will probably last about 30-50 years. And since it can be made to look like solid wood, composite decking is a popular choice as an alternative to wood decking.

Aluminum/Steel Decks

Metal decking, on the other hand, is not a very popular choice. Sure, it’ll last up to 60 years. But it’s very expensive and most people do not like the look of them.

Also, while aluminum is somewhat of an insulator, steel is not. Expect a steel deck to be oven-hot in the summer and ice-cold in the winter.

Still, if these factors don’t bother you, a metal deck will last you a very long time.

How Long Do Decks Last?

By now, you should have a thorough answer to the original question. Based on the decking material and other factors in this list, you can calculate how long your deck, or desired deck, will last. Also, use the information in this guide as advice on how to make your deck last longer.

Now that you have your answers, do you have any friends who’re wondering, “How long do decks last?” If so, please share this guide to help them out as well.

Lastly, if you still have any questions about deck longevity, we’re here to help. Contact us here to submit your questions, inquire about an order, or to request a quote.

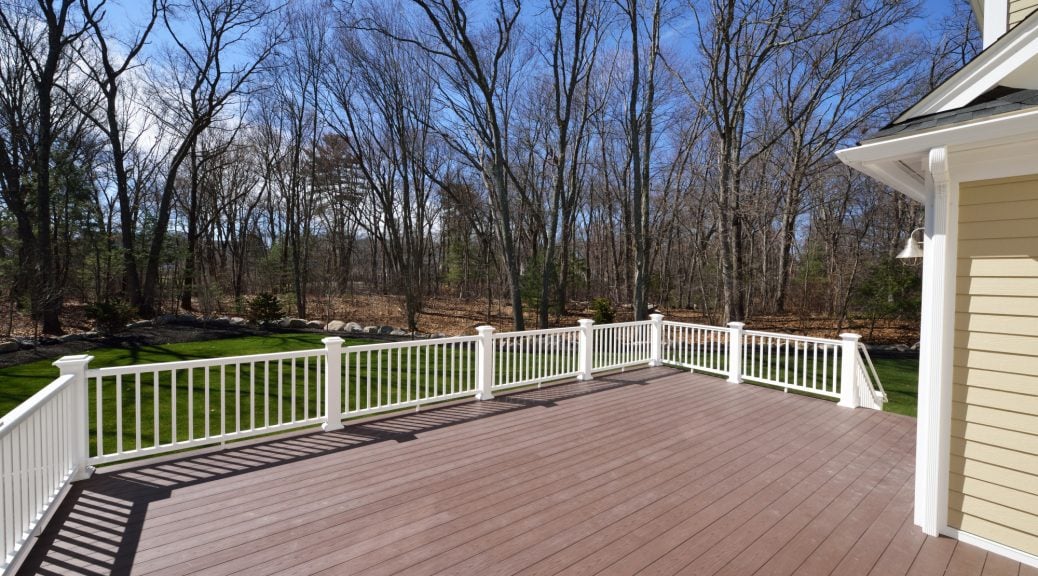
How Long Does It Take to Build a Deck for Your Home?

A new deck can add thousands of dollars to your home. In fact, with its high return on investment, it’s one of the best and most reliable ways to increase your property value.

But whether you want to create an outdoor living space or want to make worthwhile renovations before putting your home on the market, you might be asking yourself this question: “How long does it take to build a deck?”.

There’s no one-size-fits-all answer to this question. It’s impossible to put an accurate timeframe on the deck-building process because there are so many variables that can slow everything down.

We’ve put together this guide to help you figure out what to expect when you’re adding a deck to your home, so make sure you keep reading below.

The Planning Process

Before you can buy the wood and start nailing, you have to design your deck. Once you have the basic plan, you’ll need to run it past a contractor so (If you aren’t one for drawing blueprints, you can have the contractor handle this entire step).

This takes time.

You should set aside a week or two to come up with a design, choose the right wood, and double-check the details. The process might not take this long, but don’t be surprised if you need more than a few days to get everything done.

Hiring a Contractor

If you don’t already have one, you then have to hire a contractor in your area. To ensure you get the best price and the best services, it’s a good idea to get a quote from several different companies.

Researching and calling all these companies can take a week or two. If you want your new deck as fast as possible, you can start looking for a contractor in advance so they’re ready right when you need them.

You also have to consider the contractor’s schedule. They may be booked for the next few weeks (or even months). You may have to spend some time waiting to get a contractor you trust.

Getting the Right Permits

Your contractor will have to examine your property and review the zoning laws in your area. Depending on where you live, you may have to apply for a building permit before you start building. Filling out the application won’t take longer than an hour (give or take), but you may have to wait days, weeks, or even months before the local government grants you a permit.

The Construction

The actual construction is often the fastest part of the deck process. But again, it’s difficult to put an accurate timeframe on this step because there are a number of factors that impact how long the job will take, such as:

  • The Size — the bigger the deck, the longer it will take to build
  • The Design — if you choose a custom design over a simple style, you should expect a few days (or more) of slowdown
  • Extra Additions — things like built-in benches, stairs, rails, hot tubs, etc. take more time to add
  • The Accessibility — if there are a lot of plants or other objects on your property, the contractor will have a difficult workspace, which will slow things down
  • The Building Site — depending on the condition of your yard, the contractor may need to clear or level the ground before they start building

You also have to order the wood in advance, and the shipping can take several days (or weeks). This is especially true if you buy a unique or uncommon type of wood, such as exotic woods like Ipe or Tigerwood.

It’s also important to remember that some woods need time to acclimate to the local climate. You won’t be able to start building with them as soon as they show up at your house. Instead, you’ll have to let them sit outside for a few days.

If you skip this step, your deck may show signs of damage much faster than it should.

The Weather Conditions

Building a deck is an outside job. Because of this, the contractor is forced to work around the weather conditions, and it may not cooperate.

If it starts raining, you may have to put the process on hold until the area gets better weather. Always plan for a delay due to weather even if there’s no rain in the forecast.

How Long Does It Take to Build a Deck? Getting From Start to Finish as Fast as Possible

So how long does it take to build a deck? If you have a simple design and everything goes according to plan, you can get through the entire process in about one to three weeks.

However, it often takes much longer than this. Waiting for the necessary permits and adding extra features to your deck can slow things down. You may have to wait several months before your deck is completely finished.

Make sure you set realistic expectations. Hiring a reliable contractor will allow you to finish your deck as fast as possible, but there will always be delays. You should plan for your deck to take a week or two longer than you think. This way, you won’t be disappointed when things fall behind schedule.

Ready to start the deck-building process?

Make sure you take a look at some of the beautiful wood we offer and don’t hesitate to get in touch with us if you have any questions about our products!

Crucial Steps to Winterize and Protect Your Deck

Soon, the crisp autumn weather will leave us behind and a healthy layer of snow will blanket the ground. When that happens, you need to make sure that you’re ready. You have to winterize your deck.

If you don’t, the snow and ice that comes with the chilly season will trap moisture into the wood and cause mold and rot. If that happens, you’ll have to replace your Ipe wood deck as soon as the warm weather comes back.

Preparing your hardwood decking goes further than sealing it to keep moisture out. Check out this guide for a full list of steps that you should take to winterize your deck.

Do a General Inspection

First things first, take a look around your deck to see how things look. It will be hard to make general repairs once your deck is covered in snow so, it’s best that you get it out of the way now.

Secure any loose nails that you find. If there are some boards that are looking a bit worse for wear, chances are they won’t last through the winter. Go ahead and have them replaced.

Clean Things Up

Once everything looks good and secure, it’s time to do a little cleaning. If you leave any leaves or pine needles on your deck, they’ll trap in moisture and cause the wood to rot.

Sweep all of it away and bring your potted plants inside if you can. Not only will the winter weather harm the plants but the moisture the pots give off might rot your hardwood decking as easily as the pine straw will.

Check for Weak Tree Branches

You can prepare your deck for the winter all you want but if a tree branch falls on it, all your hard work will be for nothing. Look for signs of tree rot.

If you see any dead branches, go ahead and trim them away. It’s good for the health of the tree and it will save your deck from any unfortunate accidents.

If you live in an area that sees heavy amounts of snow and ice, even a healthy branch might break. You might want to do some trimming just in case.

Power Wash

You don’t want to leave grease and other gross residue sitting on your deck throughout the winter. Rent a power washer and clean any and all mildew off your deck.

If you have an older deck, a power washer might do more harm than good. Instead, go over it with a bleach-free cleaner. This will be enough to get rid of grease and mildew without discoloring and chipping the wood.

Perform the Water Test

It’s time to test your wood to see how it holds up to water. Give your deck a small spritz with a garden hose and see if the water runs off. If it does, you don’t have much to worry about.

If it doesn’t you should re-stain your deck to create a layer of protection. You should pay extra attention to the areas where the water pools. It might be a good idea to have the boards in those places replaced.

Seal the Deck

As we said above, if your deck is no longer repelling water as it should, it’s time to re-stain it or waterproof it. Now, you can’t throw a sealer on it can call it a day.

You have to pay attention to the weather first. If you don’t, the sealer won’t be as effective and your wood will rot before the winter ends.

Play the Waiting Game

Your deck has to be completely dry before you throw a sealer on it. If it’s not, as the deck dries the sealant will come out of the wood along with the water.

The good news is that there are a few signs that your deck will give off when it’s ready to be sealed. The wood will turn a lighter color and you’ll be able to see a little bit of space between the boards.

Check with the Weatherman

Warm weather helps the seal dry faster and makes it more effective. This being said, check to make sure that the weather is going to be above 50 degrees for at least 48 hours after you seal the deck.

This is easier said than done. While fall and spring weather usually stays above 50 degrees during the day, the temperature may plummet during the night and ruin your sealant.

The temperature isn’t the only thing that has to be favorable. Take a look at the 5-day forecast to check for rain, snow, sleet, and other nasty weather conditions.

Store Your Plants and Furniture

Again, you want to store your plants away because the pots will trap moisture into your deck. The cold weather might also ruin your ceramic pots and kill your plants. Check the leaves for spiders and other creepy crawlies and bring the pots inside.

The same can be said about your outdoor furniture. You won’t be having a family BBQ in the middle of the winter so wash down your furniture and store it away until the warm weather comes back. If you don’t, you’ll be buying a new set when the springtime comes along.

Winterize Your Deck in Time for the Cold Season

You need to take the proper steps to winterize your deck before the icy weather brushes through. This way, you won’t have to deal with rot and mold in the spring.

Take the time to seal the deck, remove your potted plants, put away your furniture, and clean the wood. Trust us when we say you won’t regret it.

If you want your deck to be dry enough for sealing before the cold weather hits, it might be a good idea to begin your deck building project now. Check out our large selection of Ipe decking to get started.

7 Tips on Installing Ipe Decking for New Homeowners

Attaching a deck to your home can raise your property value by over $8,000.

And that’s just an average. Getting creative with the design or using exotic wood, such as Ipe, can make that number get even higher. However, working with exotic wood is a bit more difficult than using traditional wood types. 

We’ve put together this guide to help you learn seven important tips that’ll make installing Ipe decking easier, so let’s get started below! 

1. Let It Sit

You shouldn’t use your Ipe wood right after you buy it. Instead, you need to let it sit outside for at least seven days to give it a chance to acclimate to the weather conditions in your area. 

Start by creating a base for the Ipe wood out of bricks or blocks of wood (leaving the wood directly on the ground can dirty and damage it). Then layer the wood in a stack on top of them, leaving new blocks or wood shims between each new board. This will help ventilate the wood and make the adjustment period faster. 

Make sure you leave the wood uncovered during this time. Remember, you want each Ipe board to have enough ventilation, and a tarp or other covering will just get in the way. 

If you think it will rain during these seven days, you can put a large piece of plywood on top of the stack. However, you’ll want your Ipe wood to be fully dry before you build with it, so do you best to schedule the acclimation period during a warm and dry time of the year. 


2. Wear the Proper Safety Equipment and Use the Right Tools 

While your Ipe wood is acclimating, you should make sure you have all the right equipment and tools on hand. 

Keep in mind, Ipe wood is much harder and denser than other types of wood. Because of this, you may not be able to use your every-day tools. Using technical grade tools will give you the best results when building with this type of wood. 

You should also wear all the proper safety equipment at all times while working on your project. This includes things like gloves, safety goggles, dust mask, etc. This will protect you from sawdust and splinters. 

3. Leave a Big Enough Gap Between the Boards 

Ipe wood needs proper ventilation. Without it, the boards are more prone to damage, such as cupping or surface checking. Make sure you leave about 3/32 inches between each board. 

Without this space, the wood also won’t have enough room to expand and contract with the weather. While you likely won’t notice these changes, not giving the wood enough space to move can cause problems and lead to damages. 

4. Work as Far Away From the Edges as Possible 

Do your best to drill any holes or hammer any nails as far away from the edges of the Ipe boards as possible. This will reduce the risk of splitting the ends. 

However, depending on the design of your deck (or other projects), this might be unavoidable. If you have to work close to the ends, be careful. Taking your time and double-checking everything is the best way to keep your Ipe in good condition during the building process. 

5. Seal the Ends 

You should seal any fresh-cut ends right away. Sealing these edges will prevent checking, which will help the wood last longer. 

6. Finish the Wood With the Right Sealant 

Once you’re done building your deck or other structure, you need to decide if you want to seal the Ipe boards or not. Sealing the wood will protect it from the weather, stains, discoloration, and other types of damages. 

However, you don’t have to seal the wood if you don’t want to. 

Left unprotected, Ipe wood will fade to a beautiful silver/grey color over time. If you like how this natural aging process looks, you may want to skip the sealant. 

If you do want to seal your Ipe, you should check the wood for any sticker marks first. While these sticker marks will fade with time, you can get rid of them right away with a bit of light sanding, and you’ll need to do this before you seal the wood. 

7. Keep up With the Maintenance 

The most important part of Ipe wood maintenance is resealing.

Every few years (about two to three years), you need to sand off the current layer of sealing or any small surface damages. Then you can apply a new layer of sealant. If you don’t do this, the old sealant will wear off and be unable to protect your wood. 

You should also do your best to clean any spills or stains right away. Use a cleaning product that is safe for Ipe wood and spot clean the area. This will keep the wood from discoloring or damaging any farther. 

What You Need to Know About Installing Ipe Decking on Your Property 

If you’re getting ready to start installing Ipe decking on your property, make sure you follow the tips on this list. And remember, Ipe wood is heavy! You may need some help lifting it, moving it, and working with it. Trying to get through the project on your own isn’t worth the risk of getting injured. 

Not sure where to buy Ipe wood?

We’ve got you covered! Make sure you take a look at some of our Ipe wood options today! 

Building a Deck Frame 101: How to Choose the Perfect Wood for Your Project

Don’t use just any old wood for your brand-new deck. Before you build your deck, do a little planning.

A deck can make your home look bigger and better. When planned thoughtfully, it can also add some spice to your façade.

Decks make great outdoor entertaining spaces. If you reside in a scenic area, a deck is a great way to take advantage of the view.

If you’re going to build a deck, it helps to understand the basics of the project. Read on to learn the basics of building a deck frame.

Building a Deck Frame

Before you build your deck, always remember to check local zoning laws and apply for any necessary permits. You don’t want your dream deck to turn into a hotbed of trouble with the local authorities.

A reliable deck needs a good foundation. There are several ways to set the posts of your deck.

A popular method involves pouring concrete into the post holes. Next, you’ll set the posts in the concrete. Then, you’d backfill the post holes with gravel.

To keep your posts from rotting, you can set them in aboveground concrete footers. No matter what method you use, however, you should make sure that you set your posts above the frost line.

The frost line is the level where the ground freezes. By setting your posts above the frost line, you’ll prevent freezing ground from pushing the posts out of their foundation. The frost line is different in various regions, so you’ll have to find out how deep it is in your area.

You’ll also need to fasten the support beams and joists. It’s important to use hardware for treated lumber to attach your deck materials.

For instance, use stainless steel or hot-dipped galvanized fasteners. Standard fasteners will rust, ruining your entire deck over time – more on that shortly.

The Best Wood for Decks

There are many tasks involved in the installation of wood decks. One of those tasks is choosing the wood.

There’s a lot of wood types that you can choose. It can prove difficult choosing one, especially if you’re wondering about the best wood to use for decks.

Here’s a tip: Hardwood lumber is your best option. It’s beautiful and durable.

For instance, Ipe is the best wood for an outdoor deck. You may have also heard it called Brazilian Walnut or Pau Lope wood.

Garapa wood is approximately half as hard as you Ipe wood decking. Still, it retains many of the positive traits of Ipe building material.

Cumaru wood is another attractive Brazilian building material. It’s only slightly less hard compared to Ipe wood. Cumaru wood also retains many of the good qualities of Ipe wood decking.

You may have also heard Cumaru wood called Brazilian Teak. It has a medium-brown color and also comes in exotic purple tones.

Cumaru wood is more affordable compared to Ipe. However, it doesn’t have the flawless appearance of this more superior product.

Wood Deck Ideas

Now comes the fun part – picking the right finish for your wood deck. There are three options for finishing wood decks – paint, stain or raw wood.

It may seem unusual to paint a wood deck. However, there are benefits to using paint.

If you choose the right color, for instance, you won’t need to clean it often. Also, it’s easy to clean some high-quality paints. Furthermore, quality paint lasts long.

However, you need to make sure that’s what you want to do. Once you’ve painted your deck, it’s difficult to restore it to a natural wood finish.

Most people choose to stain their decks. Stain enables you to retain the natural beauty of the wood. With some woods, stain brings out the beauty of the material.

However, stain doesn’t last as long as paint. The amount of time that wood stain lasts varies depending on how many coats you apply as well as the quality of the coating.

Finally, you may decide not to treat your deck materials. One advantage of not treating your deck wood is that you can use it immediately. With diligent cleaning and maintenance, your deck will still last for years.

Redwood and Red Cedar resist insects and decay naturally. However, untreated wood will discolor, especially in high-traffic areas.

Still, the right raw wood will stand the test of time, as long as you don’t live in an environment with extreme weather. It will look different over time but will still retain its durability.

Designing Your Wood Deck

Before you build your deck, think about the big picture. As a rule of thumb, you should build a deck that’s no larger than 20-percent of your home’s total square footage.

You should also consider how you’ll make use of your deck. For example, you may want to use it for entertaining. In that case, you may want to consider including a fire pit feature and space for outdoor furniture.

It’s also a good idea to build your deck a few inches below your door. This method isn’t as attractive as building the deck flush to your doorway. However, it will prevent debris from making its way into your home.

It’s also helpful to have a deck that’s lower than your entryway when it snows. A deck that’s set a few inches below your door will keep snow from blocking the entryway in the wintertime.

Trust Us for the Best Wood for Your Deck!

There’s much more that goes into building a deck frame. However, this overview gives you an idea of the basics of building a beautiful outdoor area for your home.

Ipe Woods USA is the leader in direct-to-consumer exotic hardwood. Were also a member of the International Wood Products Association and the National Hardwood Lumber Association.

You can count on top-notch service from Ipe Woods. We’ve won the Houzz “Best of Customer Service” award two years in a row.

It’s our mission to provide the highest quality Ipe wood at the lowest cost. Contact us today at (844) 674-4455 for a free quote for your next deck project.

The Hardest Hardwood Floors: Are They Worth It?

You love the look of hardwood floors, but you’re worried about the dents that could come from everyday use.

This is a genuine concern that many people have.

Being a homeowner, you know that even the slightest movement of furniture can be enough to mark up the floors. You might have young children who use the floors as a playmat.

The hardest hardwood floors are your answer to decorating your home in a practical way.

While no floor can completely guard against dents, the hardest can do a great job at resisting it.

Are you interested in finding out why the hardest hardwood floors might work for you? Read on to find out why they’re worth the investment.

How Hard Is The Hardest Wood Flooring?

Hardwood floors are rated for their hardness using the Janka scale.

Each type of wood receives a Janka rating. The lowest numbers on the scale mean that the wood is more likely to dent, while the highest numbers mean that the wood can resist dents better.

The one thing that the Janka scale does not determine is how likely the wood is to get scratches. Instead, it determines the hardness of certain types of wood flooring.

The lowest ratings are typically in the hundreds, with the highest ratings usually reaching into the thousands.

When looking at the hardest of wood floors, you want one with a high Janka rating.

What Is The Hardest Type of Wood Flooring?

When looking into the hardest hardwood floors, there are a few options to decide from. Since all the options rank high on the Janka scale, your choice should come down to the floor that is right for you.

Hickory

Hickory is one of the hardest domestic woods available for hardwood flooring. It ranks fairly high on the Janka scale at 1,820. It’s a good option that surpasses the industry standard of hardness, but there are many harder options to consider as well.

While hardwood from the United States is used for flooring, it’s not the hardest that’s available. If you’re looking for the hardest floors you can find, exotic species are the way to go.

Garapa Hardwood

Garapa is a hardwood that also takes on the name of “Golden Teak.” One great feature of Garapa hardwood floors is that they are golden in color. It’s one of the softer options when it comes to exotic wood as it has a 1,700 Janka rating.

Garapa is often used outside for decking, so it’s prepared to take on some of the toughest scratches. This makes it a great option for hardwood flooring indoors. It will brighten up a room while keeping up with high traffic.

If you’re looking for an affordable, yet durable option, Garapa might be the choice for you.

Tigerwood Hardwood

Looking for a unique hardwood floor with a lot of character? Tigerwood can give you all that and more!

You might know it better as Brazilian koa or African walnut. It’s a popular choice for hardwood floors for many reasons.

It’s a great option if you want your floors to stand out while protecting against marks and scuffs. Its Janka rating is 2,160, meaning that it surpasses the hardness of domestic woods.

This means that it’s a great option for flooring as it resists dents and damages well.

The lifespan of tigerwood is another great feature of this hardwood. That unique tiger print pattern can stand out for many years to come!

Cumaru Hardwood

Another name for Cumaru is Brazilian Chesnut. This falls in line with the beautiful brown color that makes this wood so stunning.

Cumaru ranks at 3,540 on the Janka scale making it one of the hardest hardwood floor options available.

Pairing its durability with its beautiful patterns, it’s a great option if you want some of the hardest wood available for your flooring.

Ipe Hardwood

Ipe or Brazilian walnut is top-notch if you want the hardest and most durable flooring on the market. It boasts a Janka rating of 3,680, making it extremely hard to dent.

Aside from its extreme hardness, it’s good for a few other reasons as well. One reason is that it’s available in many colors. This makes it a great option for you if you want a certain look to go with extreme durability.

In addition to this, Ipe is also fire resistant!

If you’re looking for the toughest of wood that will last a lifetime, then Ipe is the choice for you.

Are The Hardest Hardwood Floors Worth It?

Janka ratings that are over the standard aren’t bad choices. There are plenty of advantages to consider when going with the hardest hardwood floors on the market.

Consider the area that you plan to install the flooring in. Is it a high traffic area that is bound to see rough wear and tear? Is it an area that a pet will use often? If you said “yes,” then you would benefit from choosing a hardwood floor with a higher Janka rating.

This way, you wouldn’t see as many dents on your floors from impact and high traffic. Even if the kids came in and slid their chairs across the floor, they’d do a great job of resisting the scratches.

Finding a good balance between the look that you want and the durability of your flooring will help you reach the best decision for you.

If dents and scratches are your main concern, the hardest hardwood floors will be worth it.

Want to Learn More About the Best Hardwood Floors for You?

Choosing the right flooring is an important decision. Flooring is meant to last you for many years to come, so you’ll want something that can hold up over time.

At Ipe Woods USA, we have a large variety of durable wood choices, the main one being Ipe. You can trust that your hardwood flooring will stand the test of time and of course, the Janka test!

If you’re ready to invest in the hardest hardwood floors you can find, you’ve come to the right place. Contact us to find out how we can help you find the hardwood flooring that’s right for you!

Modern Siding Trends That Homeowners Are in Love With in 2020

The exterior of our homes is often a forgotten area for smart design. But improving the curb appeal of your home can increase its value by 3-5%

New, modern siding can be exactly the upgrade your home needs. These modern styles are becoming more and more popular with a variety of applications. The wide variety allows you to find just the right look for your home. 

Let’s take a deeper look into modern exterior trends and your options. 

Modern Siding Materials

One of the main characteristics of modern exterior design is the use of specific materials. 

Modern style usually has a mixture of materials that seem opposite to each other. Natural wood will be accented by man-made cement or metal. This contrast gives a unique, intentional look for a well-designed home. 

There are several types of siding for houses looking for a modern design. 

Ipe Wood

Almost all modern homes will feature some kind of wood in their design. This element is crucial for the overall contrast needed to achieve the right look. 

A very popular choice for wood siding is Ipe wood or Brazilian walnut. This type of wood is known for its durability and strength, eight times stronger than redwood. It sets the industry standard for wood. 

Many choose this type of wood siding because it holds up so well to the elements. Ipe wood has a natural ability to withstand rot and decay, so it’s perfect for outdoor use. 

There is also very little maintenance (or none if that’s what you choose) to keep it looking fresh. Ipe wood provides the natural element used in modern design without the hassle and upkeep required by other materials. 

Fiber Cement 

Many who are going for a modern exterior will contrast the soft-looking wood elements with some harder, man-made elements. This can easily be achieved by using a fiber cement siding. 

Fiber Siding can be molded to have a variety of different looks, which can be helpful in exterior design. It can also be painted or stained to match the rest of the design. 

This material is quickly replacing vinyl siding throughout the industry. It has a similar look but is much more durable and requires less maintenance. Fiber cement combined with some Ipe wood would give a contemporary siding finish. 

Concrete

One of the hallmarks of modern design is the touches of industrial materials. These help to create that contrast we’ve been talking about. 

Many homes will use areas of concrete to bring in some hard touches to the design.

Though this material is generally reserved for accents or small areas because of the work to install it. Using concrete is more expensive and much more labor-intensive. A professional will definitely have to do this type of work.

But the finished product is quite striking.  

Steel

Similar to concrete, metal is often used in modern design to bring in a harder element for contrast. Steel is most commonly used for this purpose. 

Steel has become a popular choice because of its quite durable as well. It’s easier to work with and can be manipulated to fit the needs of the design. Unlike concrete, it is easier to use on larger areas. 

These metal accents can make a very big impact on the overall exterior design. 

Modern Siding Style

It could be argued that the materials used are the most important part of good modern exterior design, but the style of siding is also just as important. 

There are a few modern siding options that easily create the look you’re going for. 

One of the most popular options is to change the traditional thickness of siding slats. So some homes will have much thinner boards and others will have much thicker. This gives more of a customized look by changing the norm. 

Some even cut their siding into large squares or rectangles to be hung on the home. 

A modern design calls for the unique placement of the siding materials. They can be run vertically or on the diagonal. Some modern homes include intricate designs in their siding. 

This customization is also why Ipe wood is so popular for exterior siding. It can be cut and manipulated to fit any design needs. 

The style and the way the siding is placed is a crucial element to the overall design. It can make or break the look, so it’s important to decide carefully. 

Modern Exterior Extras

Modern design hinges on the use of accessories and accents. These are the elements that bring the contrast out and make it appealing. 

One very large accent that is popular among modern designs is a metal roof. These are especially becoming on a home with Ipe wood siding. Many roofs are also flattened to create an over-the-top modern look. 

But if you aren’t looking to completely change the structure and material of your roofing, there are plenty of other modern accessories you can use. 

Adding accent lighting is a great way to highlight key design elements. The easy addition of a few uprights on the side of your home, maybe near the front door or the main accent wall, can make a huge difference. 

The hardware can bring in the contrasting harder elements as well. Industrial lights, door handles, and house numbers bring in that needed metal. 

A modern exterior just doesn’t work without these little details. 

Update the Look of Your Home 

Updating the exterior of your home can seem like a very daunting task. Largely because it can be such a major investment.

But if you start with the basics of choosing the right modern siding, you’re sure to get the look you want.

These modern materials, like Ipe wood, provide not only a stunning look but also a strong foundation. They are durable and will look great for years to come! 

If you’re interested in getting started on some Ipe wood siding, contact us today! 

The Pros and Cons of the Various Types of Fences

If you’re one of the 65.1% of Americans who call themselves a homeowner, you likely are always on the lookout for new ways to protect and to customize your property.

A new fence does both of these things. That’s why we’re going to talk today about the many types of fences on the market that you can choose from, so read on for some information on how to make your house stand out!

Metal Fencing

Metal fencing is pretty common for those looking for something attractive and durable. Usually, steel or aluminum will be chosen as fencing material. However, these materials aren’t all they’ve cracked up to be. Read on to learn why.

Pros

  • Aluminum and steel fences are generally pretty low-maintenance. All you’ll need to do is hose them down every once in a while and they’ll stay clean.
  • Metal fencing is pretty inexpensive, but since you’ll need to replace it often, this is a pretty moot point.

Cons

  • Metal fencing may sound durable in theory, but many people don’t account for the fact that they’ll rust. Since fencing is constantly subjected to the elements outdoors, it’s only natural that water will set in metal fencing and slowly erode at it. Although some metal fences come with a ‘protective coating,’ this coating generally comes off fairly quickly.
  • You can’t really paint a metal fence in a color that matches your home, meaning that you have very limited ways of expressing yourself with these styles.
  • Metal fences are lacking in privacy because anyone who walks by can see through the pickets. If you have children, a pool, or are just a generally private person, this can be a concern.

Wood Fencing

Metal fencing isn’t the best, but wood fencing? It’s pretty great, as long as you know the right kind of wood to get. In this section, we’re going to talk about some of the most common types of wood fencing on the market so that you can choose the material that works best for you.

Ipe Wood Fencing: The Superior Wood

Ipe wood is the best wood on the market in terms of quality and value. It’s the perfect fencing material in pretty much all ways, and here’s why.

Pros

  • Ipe wood is one of the hardest woods that you can find and use when building fencing. For this reason, it will last you for many, many years and can withstand harsh weather conditions.
  • This material is absolutely gorgeous. By the time we sell it to you, it’s been shined and buffed to perfection, and once this happens there won’t be a single blemish in sight.
  • The natural color is also beautiful. In addition to the lack of knots, knobs, and unnatural grain, the color of this wood is a rich, shining brown with hints of black.

Cons

  • Ipe wood, because of its high quality, is a bit more expensive than Cumaru or Garapa wood.

Cumaru Wood Fencing

Cumaru wood is an incredibly gorgeous and unique Brazilian wood. If you want to show off your good taste, you may want to consider its many aesthetic and practical merits.

Pros

  • First off, Cumaru is a gorgeous lumber. It’s generally a medium brown, which would be unremarkable but for the hints of purple in it. This not only draws eyes to it but also gives it a magical feeling that you’re sure to be proud of.
  • It’s definitely cheaper than Ipe is, so if you’re looking to save a bit of money, this is the wood for you.
  • Cumaru is durable in all of the same ways that other hardwoods are.

Cons

  • Cumaru is slightly lower on the hardness scale than Ipe wood is.
  • Unlike Ipe, Cumaru has knots and blemishes in the grain. However, many people believe this to give it character, so it isn’t always a bad thing.

Garapa Wood Fencing

Garapa wood is an inexpensive alternative to Ipe or Cumaru fencing. Though it may be an ‘inferior’ alternative, it’s still pretty awesome.

Pros

  • If you don’t care what your wood looks like because you’re going to paint over it- which is a totally valid thing to do- Garapa wood is probably the right way to go. While it is an attractive wood in its own right, it’s pretty cheap, so those who want to save a buck (and are going to paint the wood anyway) might as well choose this option.
  • If you don’t want to paint but like lighter-toned woods, Garapa’s yellow tone is also for you. It’s unique, noticeable, and interesting.

Cons

  • Though Garapa wood is indeed durable, it’s less than half as hard as Ipe and Cumaru wood. This means that it’s more susceptible to rot and warping than the other woods on this list (though not overly susceptible.)

Styles of Fencing

No matter what type of wood fencing you choose to go with, there are options as to the styles of wood that you can get. Pre-grooved fencing and eased-edge fencing are both great options that hold your fence together to make it sturdy and strong. Read on to compare and contrast the benefits of these two types of pickets.

Pre-grooved Fences

Pre-grooved wood was originally made to be decking, but it’s a great tool for constructing a privacy fence, too.

Pre-grooved privacy fences basically have slots cut into each side of the board so that they can fit together using hidden fasteners. This makes it so no one can see through the fence (that serves the purpose of a solid wall).

Pros

  • There won’t be any external screws to tarnish the surface of your fencing.
  • Grooved fences are easy to install.
  • These options are unlikely to come apart because they were literally made to fit together.

Cons

  • Pre-grooved fences cost more than their eased-edge counterparts.
  • It’s easy to get the incorrect size fasteners to assemble your fence. This isn’t strictly a ‘con,’ but you’ll need to double-check everything.

Eased-Ege Fences

Eased-edge wood is pretty much just wood that hasn’t been pre-grooved. It has somewhat rounded surfacing for the purposes of getting rid of sharp corners that you could cut yourself on, though.

Pros

  • They cost less than pre-grooved alternatives.
  • You can use screws of any size when assembling your fence.
  • The edges are blunted, so it’s almost impossible to hurt yourself on them.
  • If you want space between pickets, this is pretty much your only option.

Cons

Choose Between Types of Fences Today

There are many types of fences to choose from, and which one is best for you depends on personal taste and specific needs.

Now that you know all the woods and styles of fencing that you can work with, it’s time to talk to an expert! Click here to contact us and ask any questions you may have about the materials you can use for fencing.

7 Amazing Pool Deck Ideas and Designs

When having a pool deck built using IPE wood decking, you’re given peace of mind that your deck will be both stylish and safe. Safety is the most important aspect when considering having a deck built for your pool, but the importance of the style isn’t too far behind. You want a deck that you’re going to enjoy using and looking at for a lifetime.

This means coming up with a few pool deck ideas that’ll work well for your home.

Fortunately, pool decks can be built to satisfy just about anyone’s pool dreams. The first step is deciding on what kind of deck you’d like to build for your pool. If you’re not sure where to begin, then you might be in need of some inspiration.

For a list of some of the best pool deck designs and outdoor inspiration, continue reading below. Here are 7 amazing pool deck ideas that’ll have your imagination spinning!

1. Use Light Colors

Before beginning to imagine a few pool deck ideas, you first need to understand one basic element: the color. No matter what type of deck you decide to build, you always want to use a material that’s light in color. Using light-colored materials is the best way to ensure you save your feet on those sunny days.

Using dark-colored materials will attract the sun and will make walking around your pool almost unbearable on those hotter days. Because you’re going to enjoy the majority of your deck while barefoot, it’s best to go with a wood that’s lighter in color, which will reflect the sun’s heat rather than absorb it.

2. Bridge to Pool Deck

Now that you have your light-colored materials picked out, it’s time to consider some amazing pool deck ideas. One great idea for pools located not directly next to the home is to create a bridge from your home to your pool. This works wonderfully for above-ground pools but can work well with inground pools as well.

If you’re tired of having to walk through the grass or dirt before getting to your pool, then this is a great design idea to consider. Build a deck around the pool itself, and then connect a bridge from the pool deck to your home. If your home and pool are both located at ground level, then you can build a pathway that connects the two rather than an actual bridge.

Either way, you’ll get the same benefits out of this design.

3. A Circular Deck

If you have a circular pool, either in-ground or above-ground, consider building a circular deck to go all the way around it. A circular deck will complement your circular pool well. This is also a great way to ensure that all little ones are kept from entering an above-ground pool without supervision.

Stairs with a locked gate can be installed for accessing the pool. Aside from safety, it also adds aesthetics to your otherwise sore eye of an above-ground pool. For in-ground pools, a circular deck helps add to the flow of the pool and your yard.

4. Raised Deck Attached to Home

If your home is situated on a hill or mountain, you can have a raised deck built that attaches to your home. Imagine being able to wake up in the morning, walk out on your deck, and have wonderful views of your pool below you. Decks like this will have several different levels, and make accessing your pool from your home much easier.

Instead of having to walk outside and treck through grass, dirt, and rocks to get to your pool, you can simply walk out onto your deck and take the stairs to the lower level where your pool is located.

5. Party-Style Pool Deck

If you like to entertain, then having a party-style pool deck built is a great option for you. When building a party-style deck, you’ll want to have enough space for entertaining guests. This means building the deck around the pool, but then extending it past the pool to offer more deck space.

This can be done with either in-ground or above-ground pools. With your extra space, you can add seating, a fire pit, an area for grilling, and much more!

6. In-Ground Pool Deck Look

Did you know that pool decking is a brilliant way to make an above-ground pool look as though it’s an in-ground one? If you’re tired of the way your above-ground pool looks, but aren’t able to install an in-ground one, then you might want to consider some decking options.

There are several different ways in which a pool deck can be built to disguise an above-ground pool as an in-ground pool. Speak with your deck builders about the different options you have!

7. A Deck with Shade

Our last design idea is to include shading on your deck. If you live somewhere where it gets hot during most of the day, then this design idea is a must. You can build a shaded area or patio area right into your deck.

This will give you and your guests a place to relax and recharge before heading back out into the sun!

Browse These Pool Deck Ideas When Building Your Own!

When you’re ready to build your own deck, be sure to browse through these pool deck ideas listed above. All of these ideas are great options depending on the type of pool you have and its location.

For more information on decking installation and why IPE wood is the right choice for you, click here!

Deck Design Ideas: 7 Creative Deck Designs to Consider

You can extend the area of your home with a backyard deck. Whether your deck is attached to the house or freestanding, there are hundreds of beautiful deck design ideas.

The thing is that you can also get overwhelmed by all the choices. That’s why we narrowed our suggestions down to seven beautiful options.

Maybe you already have a deck that you’re updating. Or you could be starting from scratch. Either way, there are a few basic choices to make before you get into all the little details.

Once you decide on your deck’s style — nature-inspired, modern and clean, or colorful and unique — then you can think about the best decking material to use.

But first, let’s consider whether or not you want the deck open-air or if you prefer a roof type covering.

1. Versatile Outdoor Deck Ideas

A pergola is the best of both worlds, with an open roof-like top. It provides some shelter from the environment and defines a gorgeous place to entertain outside.

You’ll also have an option for a hanging garden. Plus, any kind of climbing plants are perfect for the pergola.

Clematis, honeysuckle, and wisterias are all lovely choices that will grow and twine through the boards to create a floral ceiling.

On the other hand, you can define the lines of the structure another way, leave the top open, and forgo the plants altogether. Ultimately, a pergola is a versatile option that you can use to define your style.

2. A Private Place to Relax

When it comes to privacy, it’s all about the material you use. One way to establish a private spot is to add greenery. Adding plants will reduce noise and provide a living backdrop.

Built-in planters are an excellent choice to incorporate into your backyard design. Then you can use a variety of annuals and perennials to enhance the space.

Fruits and vegetables would add a unique touch, as well. Think about herbs, tomatoes, strawberries, and other fruits and vegetables to use in your cooking this summer.

You can also build a privacy wall from natural wood, iron, or any number of other types of material.

As you can see, the possibilities are endless.

3. Level Up

Those built-in planters are just one of the backyard deck ideas that incorporate different levels.

For example, you may have a larger planter to accommodate an ornamental tree sitting next to a smaller container that holds seasonal blooms or edible plants.

What this does for your deck is to add little areas of interest.

Note that you can always switch out the greenery for sculpture, fountains, and other objects.

If you’re planning a DIY deck, you’ll want to get some professional how-to tips on what materials to use, how to choose the right fixtures, and tips on painting, staining, and finish.

Then you can get creative with adding steps, raised seating, different heights of planters (and plants), or even a sunk-in firepit depending on where you’re building.

Go up or down — Different levels will make your deck unique.

4. Indoor-Outdoor

Whether it’s french doors opening onto the deck or an outdoor kitchen complete with grill, sink, and dining — An indoor-outdoor deck is a sophisticated choice.

Imagine a two-sided fireplace that faces the deck and also the living room inside your home. Or doors that slide open from the master bedroom to enlarge the indoor space, incorporating the deck.

Plus, you can always add a play area for the kids with a basketball hoop or a swing set if you have enough room. After all, they should get to enjoy the deck too.

5.  DIY Floating Deck

As far as backyard deck designs go, you can DIY a floating deck anywhere. This tutorial breaks it down into the following steps:

  • Level the area
  • Determine the four corners and dig a hole for each cinderblock
  • Draw the lines for the interior blocks and dig a trench along those lines
  • Set the inner blocks in and level them
  • Set the outer blocks
  • Lay down the deck joists
  • Lay the deck boards

Of course, the quality of your deck depends on the quality of the materials. There are thousands of design options, and it all comes down to what you want from your deck.

Think of your floating deck as a backyard oasis that can go anywhere you choose.

6. Light it Up

You can get really creative lighting. From twinkle lights to tiki torches, lighting adds atmosphere.

Recessed lighting is an attractive choice on a deck too. And these days, there are plenty of solar-powered options as well.

Another thing to think about is where and how you’ll mount the lights. Try lighting the stairs with recessed lighting. Not only will it be pretty, but it will also make it safer at night.

LED Christmas lights are gorgeous, wrapped around rails and foliage. You can also light underneath the table and include candles and free-standing LED lights in corners and as accents.

You may want to try colored lights for some pop in a few spots.

7. All the Little Touches

Regardless of if your updating or building from scratch, you’ll want to add all the little touches that make your deck uniquely yours.

We’ve already looked at lighting, so onto furniture.

Deck furniture has to stand up to the weather. One option is to build-in the seating and add cushions.

Since built-in furniture is part of the structure, you can waterproof it like the rest of the deck, and store the cushions when the weather turns.

Other materials to consider if you don’t want built-in deck furniture are wrought iron, polymers, plastics, and aluminum. And if you’re into DIY, you can try constructing pallet furniture.

The main thing to keep in mind other than style is your deck furniture must be durable and waterproof.

Make It Your Own: Creative Deck Designs

If you’re planning to add a deck, use our blog for more deck design ideas, tips, and tricks.

Do you have any questions? Maybe you want to share your experience as you work on your deck design.

Why not go ahead and leave a comment? We’re always happy to hear from you.

Then make sure to contact Ipe Woods USA for a quote on the best wood you can buy!